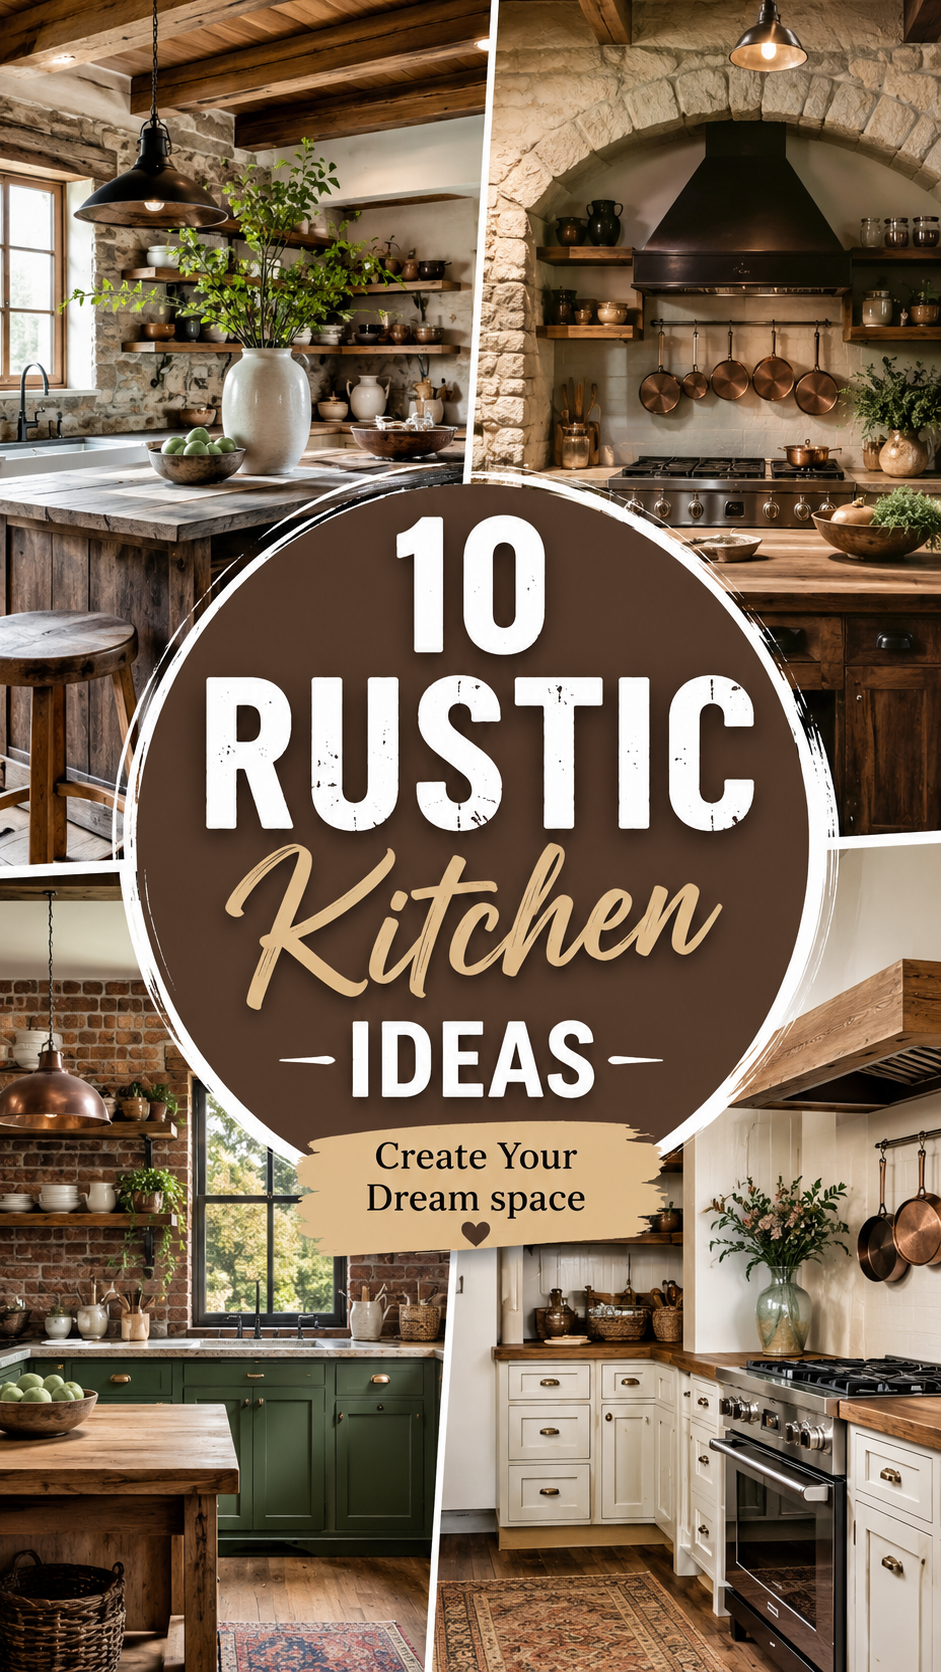
Your kitchen shouldn’t feel like a showroom. It should feel like the one room in your house where people actually want to hang out, even when nothing’s cooking.
That’s the whole point of rustic style. It’s warm. It’s a little imperfect. It looks like it’s been lived in for decades, even if you moved in last month.
You don’t need a farmhouse or a $40,000 renovation to get there either. A few smart swaps and the right textures can completely change how your kitchen feels. Let’s get into it.
What You’ll Need
- Open wood shelving (2-3 shelves depending on wall space)
- Wooden cutting boards (at least 2-3 in varying sizes)
- Woven baskets (for storage and display)
- Stoneware or ceramic dishware
- Mason jars or glass canisters
- Vintage-style pendant lights
- A wood or butcher block countertop section
- Linen or cotton dish towels
- Cast iron cookware (a skillet or Dutch oven works great as decor too)
- Dried herbs or a small potted herb garden
- Reclaimed wood accents (a shelf, a sign, a beam)
- Metal or wire fruit baskets
- A farmhouse sink (optional, but a game changer if you’re renovating)
- Neutral or earth-toned area rug
Tools You’ll Need (For DIY Elements)
- Drill and drill bits
- Level
- Stud finder
- Measuring tape
- Screwdriver
- Wood screws and wall anchors
- Sandpaper (if distressing wood yourself)
- Wood stain or sealant, plus a brush
How to Get the Look: Step by Step
1. Swap Upper Cabinets for Open Shelving
This is the single fastest way to make a kitchen feel rustic. Remove one or two upper cabinet doors, or install fresh open shelves in reclaimed or stained wood.
Use a stud finder before you drill. Mount at a height where you can actually reach the top shelf without a step stool.
2. Layer In Wood Textures
Rustic kitchens thrive on mismatched wood tones. Add a butcher block countertop section, a wood cutting board leaning against the backsplash, or a small wood island.
Don’t match every wood tone perfectly. Slight variation is what makes it feel collected over time instead of bought in one trip.
3. Bring In a Farmhouse Sink
If you’re already renovating, this is worth the splurge. The deep basin and exposed apron front instantly read as rustic.
If a full sink swap isn’t in the budget, a simple bridge faucet in a bronze or matte black finish gets you 70% of the way there.
4. Add Woven and Natural Textures
Baskets aren’t just for storage. Stack a few on open shelves, use one to corral fruit, or hang one on the wall as art.
Look for:
- Seagrass or rattan baskets
- Jute placemats
- Linen napkins and towels
5. Switch Out Your Lighting
Swap sleek recessed lights or a modern chandelier for pendant lights with an aged bronze, black iron, or exposed bulb look.
Hang them over an island or sink at 30 to 36 inches above the counter for the right proportion.
6. Display Your Cookware
Cast iron skillets, copper pots, and enamelware aren’t just for cooking. Hang a few from a wall rack or pot rail, or stack them on open shelves.
It’s functional decor, which is basically the whole rustic philosophy in one sentence.
7. Choose a Warm, Earthy Color Palette
Think cream, terracotta, sage green, warm gray, and deep browns. Avoid stark white or cool-toned grays if you’re going for true rustic warmth.
A simple accent wall in a muted clay tone can do more than you’d expect.
8. Bring the Outdoors In
Fresh or dried herbs on the windowsill, a small potted plant, or a bundle of dried wheat on the counter adds life without any real effort.
Herbs like rosemary, thyme, and basil look great and you can actually cook with them.
9. Add a Reclaimed Wood Accent
A reclaimed wood shelf, a small sign, or an exposed beam adds instant character. If your budget allows, a wood ceiling beam is a showstopper.
On a smaller budget, a single reclaimed wood floating shelf above the stove does plenty of work.
10. Finish With Layered Textiles
Rugs, towels, and even a woven table runner tie everything together. Choose natural fibers like cotton, linen, or jute over synthetic blends.
A runner rug in front of the sink adds comfort underfoot and warmth to the whole space.
Pro Styling Tips
- Mix your metals. Black iron, aged brass, and matte bronze can all live in the same kitchen. Just keep your faucet and cabinet hardware in the same family so it doesn’t feel scattered.
- Leave some shelves half empty. A packed shelf reads cluttered. Group items in threes and leave breathing room.
- Use height variation. When styling shelves, vary tall and short items instead of lining everything up like soldiers.
- Don’t skip the towels. A single fresh linen towel hanging on the oven handle does more for the “cozy” factor than most people expect.
- Add one unexpected item. A vintage scale, an old crate, or a ceramic pitcher gives the space a story instead of looking staged.
Substitutions and Variations
On a tight budget:
- Skip the open shelving install and use a single wall-mounted shelf instead
- Thrift your cast iron and stoneware instead of buying new
- Use command hooks for towel bars and small baskets
Small kitchen version:
- Stick to one wood accent (shelf or cutting board display) instead of multiple
- Use a single pendant light over the sink rather than a row over an island
- Choose smaller woven baskets that tuck into corners
Large kitchen version:
- Add a full wood island or butcher block prep table
- Install a full wall of open shelving
- Use a double or triple pendant light setup over the island
Style variations:
| Style | Key Swap |
|---|---|
| Modern rustic | Keep white cabinets, add black iron hardware and wood accents |
| Farmhouse rustic | Add a farmhouse sink, shiplap, and vintage signage |
| Boho rustic | Layer in more plants, woven textures, and warm terracotta tones |
| Scandinavian rustic | Stick to light wood tones and a neutral, minimal palette |
Make Ahead / Prep Tips
- Measure your wall space before ordering shelves or brackets so you’re not stuck returning the wrong size
- Order pendant lights early. Popular styles can take 2-4 weeks to ship
- If distressing or staining wood yourself, do this outside or in a ventilated space at least 24 hours before installing
- Wash and dry all new linens and towels before styling so they sit softer and look less stiff in photos
Budget Breakdown
| Item | Budget Option | Higher-End Option |
|---|---|---|
| Open shelving | $30-60 (DIY with brackets) | $150-300 (custom wood) |
| Pendant lights | $40-80 each | $150-300 each |
| Cast iron skillet | $20-35 | $80-150 |
| Woven baskets | $10-25 each | $40-70 each |
| Butcher block section | $60-100 | $300+ |
Maintenance and Upkeep
Rustic kitchens hold up well, but a few habits keep them looking their best instead of just looking old.
- Oil your cast iron after every wash to keep it seasoned and rust free
- Wipe wood shelves and cutting boards with a damp cloth weekly, and reseal wood surfaces every 6-12 months
- Rotate dried herbs or florals every few months so they don’t collect dust or fade
- Wash woven baskets and textiles based on material. Most natural fiber baskets just need a quick vacuum or wipe down
- Reseal butcher block countertops every 3-6 months with food-safe mineral oil
FAQ
Does rustic style work in a small kitchen? Yes. Stick to one or two focal elements instead of layering everything at once. A single wood shelf and a set of woven baskets can do the job.
Is rustic style expensive? It doesn’t have to be. Thrifted cast iron, DIY shelving, and secondhand baskets get you most of the way there for a fraction of retail prices.
Can I mix rustic with modern cabinets? Definitely. White or gray shaker cabinets paired with wood accents and black iron hardware is one of the most popular rustic-modern combinations right now.
What paint colors work best for a rustic kitchen? Warm neutrals like cream, greige, terracotta, and sage green tend to work better than cool grays or stark white.
How do I keep rustic decor from looking cluttered? Group items in odd numbers, leave open space on shelves, and stick to a limited color palette so everything feels intentional instead of random.
Wrapping Up
A rustic kitchen doesn’t happen overnight, and it doesn’t need to. Start with one or two changes, live with them for a bit, then keep building from there.
The goal isn’t perfection. It’s a kitchen that feels like yours.
Tried any of these ideas in your own space? Drop a comment and let me know which one you’re starting with, or ask away if you’ve got questions about pulling off your specific layout.