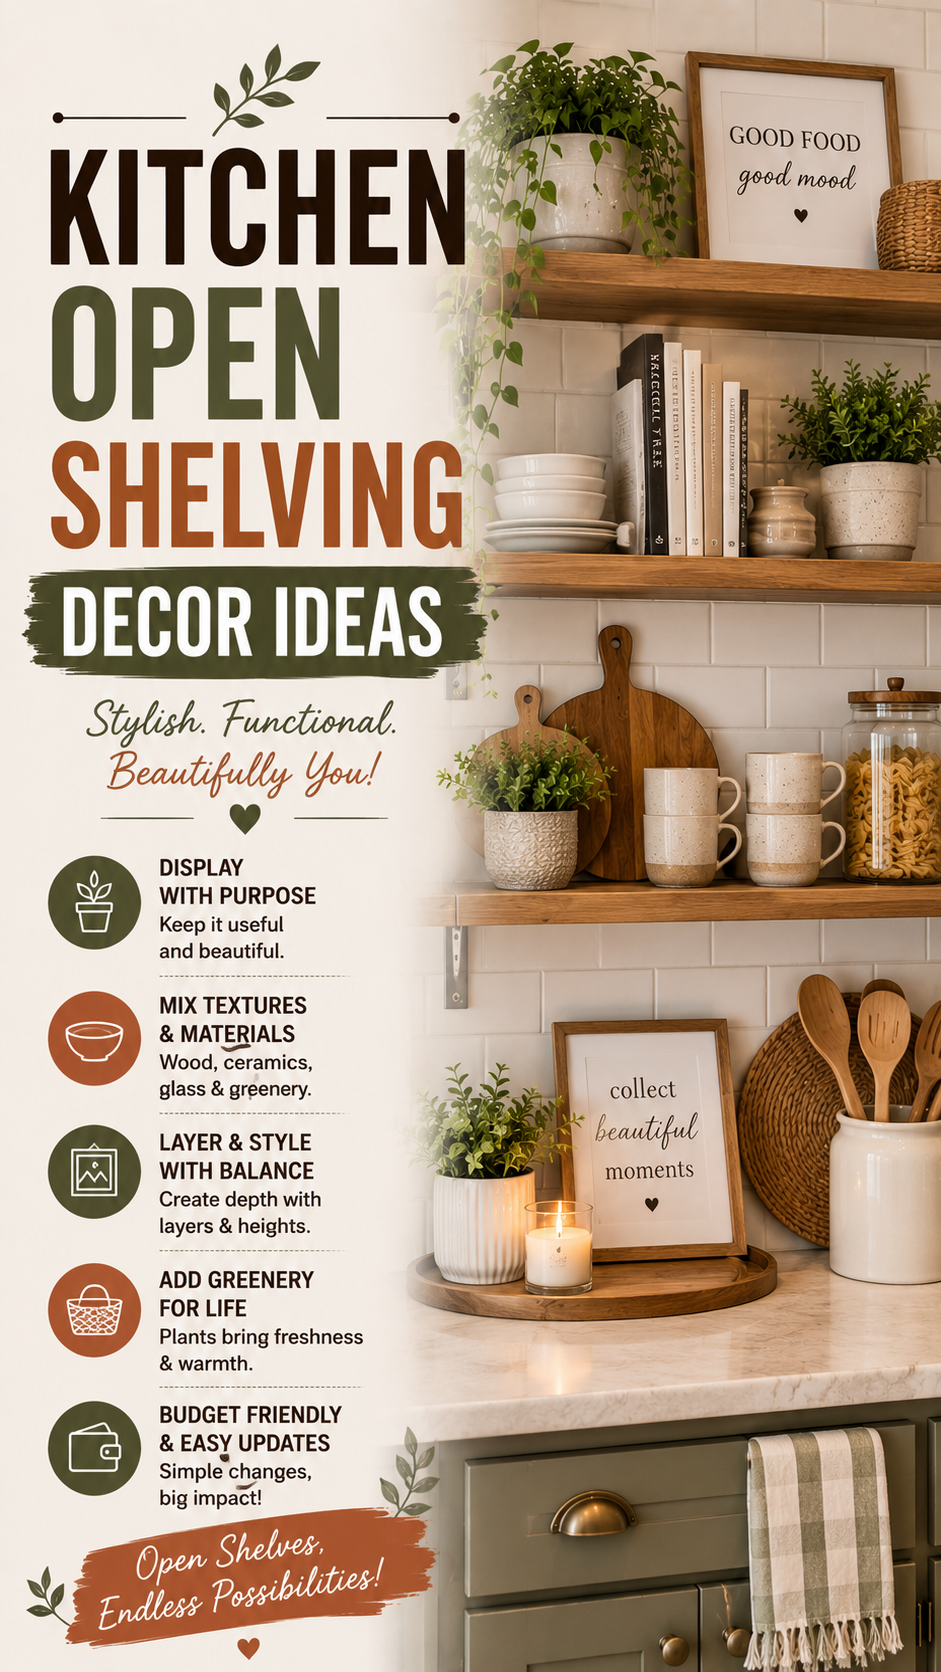
Open shelving gets a bad reputation. People swap their cabinets for shelves, then panic three weeks later when everything looks cluttered, dusty, and mismatched.
Here’s the truth: open shelving isn’t harder than closed cabinets. It’s just different rules.
Once you know the rules, it’s one of the cheapest, fastest ways to make a kitchen feel styled instead of just stocked. Let’s get into it.
Why Open Shelving Works (When It’s Done Right)
Open shelves force a little discipline. You can’t shove random junk behind a door anymore, so you naturally start editing what you own.
That editing is what makes the kitchen feel calmer. Not the shelves themselves.
A few real reasons people love this switch:
- Everyday items become decor. Your favorite mugs and bowls double as styling pieces.
- The kitchen feels bigger. Open lines read as more spacious than a wall of boxy cabinet doors.
- It’s flexible. You can restyle in ten minutes, not a full renovation.
- It’s budget-friendly. A shelf and some brackets cost a fraction of new cabinetry.
What You’ll Need
- 2–4 floating shelves (wood, wood-look laminate, or metal-and-wood combo)
- Wall anchors and brackets rated for kitchen item weight
- A level
- Stud finder
- Everyday dishware you actually use (plates, bowls, mugs)
- A few decorative pieces (small plants, ceramic vases, wood cutting boards)
- Open glass jars or canisters for dry goods
- Cloth napkins or a folded tea towel for texture
- Small stack of cookbooks (optional)
- Wall hooks for mugs or utensils (optional)
Tools You’ll Need for Installation
- Drill
- Level
- Stud finder
- Pencil
- Tape measure
- Screwdriver
If you’re renting or not drilling into walls, skip ahead to the “Substitutions and Variations” section for no-drill options.
Step-by-Step: How to Style Open Shelving
Step 1: Edit Before You Decorate
Pull everything off your current shelves or cabinets. Only items you’ll actually display go back.
Ask yourself one question per item: would I be embarrassed if a guest saw this? If yes, it stays in a closed cabinet.
Step 2: Install at the Right Height
Standard spacing is 15–18 inches between shelves for dishware. Leave more room on the bottom shelf if you’re storing taller items like pitchers or cookbooks.
Use your stud finder before drilling. Kitchen shelves hold real weight, so anchoring into a stud (or using heavy-duty wall anchors) matters more here than almost anywhere else in the house.
Step 3: Build in Layers, Not Rows
This is where most people go wrong. Lining everything up in a straight row looks like a store display, not a home.
Instead, layer your shelf like this:
- Back layer: taller items (vases, cookbooks, pitchers)
- Middle layer: stacked plates or bowls
- Front layer: small objects (a mug, a tiny plant, a candle)
Step 4: Group in Odd Numbers
Decor instinct 101: groups of 3 or 5 look more natural than groups of 2 or 4. Your eye reads odd numbers as “arranged,” not “leftover.”
Step 5: Add One Organic Element Per Shelf
A small plant, a wood board, or a woven basket softens all that hard ceramic and glass. Without it, shelves can look sterile fast.
Step 6: Step Back and Edit Again
Once it’s styled, walk to the other side of the kitchen and look at it fresh. Remove one item. It almost always looks better with less than you think.
Pro Styling Tips
- Color coordinate, don’t color match. Pick 2–3 tones (white, wood, and one accent color) and stick to them across every shelf.
- Turn plate edges outward instead of stacking flat-side up. It shows off pattern and color instead of hiding it.
- Keep daily-use items at eye level, decor-only pieces up top. Function first, styling second.
- Leave breathing room. A shelf that’s 100% full reads as clutter, even if every piece is “cute.”
- Rotate seasonally. Swap a few pieces every few months and the whole kitchen feels refreshed without spending anything.
Substitutions and Variations
No drilling allowed (renters): Use a freestanding bakers rack, a wall-mounted tension shelf, or a stylish rolling cart instead of anchored shelving.
Small kitchen version: Stick to one or two shelves max, above the sink or stove. Less surface area means less to style, and it won’t feel cramped.
Large kitchen version: You can go 3–4 shelves and mix in a hanging pot rack or a small bar cart nearby for visual variety.
Budget swap: Skip the pricey floating shelf kits. A simple pine board from a hardware store, sanded and stained, costs a fraction of the price and looks nearly identical.
Style variations:
| Style | Shelf Material | Color Palette | Key Accessories |
|---|---|---|---|
| Farmhouse | Raw or whitewashed wood | White, cream, warm wood | Mason jars, woven baskets |
| Minimalist | Black metal or thin wood | White, black, one neutral | Plain ceramics, single plant |
| Boho | Warm wood with rounded edges | Terracotta, sage, cream | Macrame, dried florals, rattan |
| Coastal | Whitewashed or light oak | Blue, white, natural | Woven trays, glass jars |
Make Ahead / Prep Tips
- Measure your wall space before buying shelves. Standard shelves run 24, 36, or 48 inches, and guessing usually means a return trip.
- Order dishware in advance if you’re buying new pieces to display. Handmade ceramics especially can take weeks to ship.
- Test your layout on the counter first. Arrange your grouping on a table before it goes on the wall. It’s much easier to edit before anything is drilled in.
- Check weight limits on your shelf brackets against your dishware collection. Stoneware adds up fast.
Budget Breakdown
- Basic setup (2 shelves, brackets, existing dishware): $40–$80
- Mid-range (3–4 shelves, a few new decor pieces): $120–$250
- Full styled kitchen (new shelving, curated dishware, greenery, hardware): $300–$600+
Maintenance and Upkeep
Open shelving needs more upkeep than closed cabinets. There’s no door hiding dust.
- Wipe shelves weekly with a damp cloth, especially near the stove where grease travels further than you’d think.
- Wash display dishware even if it’s not in daily use. Dust settles into glaze and grooves fast.
- Trim or replace any plants that start looking tired. A wilting plant undoes an otherwise great shelf.
- Reassess your grouping monthly. If it’s started creeping back toward clutter, it probably has.
FAQ
Is open shelving actually practical for daily cooking? Yes, if you keep your most-used items on the most accessible shelf. Function should always come before styling.
Will grease and dust be a big problem? It’s manageable with a quick weekly wipe-down. Shelves farther from the stove need far less attention than ones right above it.
Can I mix open shelving with regular cabinets? Yes, and it’s actually one of the most popular layouts. A lot of kitchens use closed lower cabinets and open upper shelves for the best of both.
What’s the ideal shelf depth? 10–12 inches works for most standard dishware. Go slightly deeper if you’re planning to store larger serving pieces.
Do I need matching dishware for this to look good? No. Coordinated colors matter more than matching sets. A mix of white and one accent tone reads as intentional even if the pieces are from different collections.
Wrapping Up
Open shelving isn’t about owning perfect matching dishes or a Pinterest-worthy collection of ceramics. It’s about being a little more intentional with what’s on display and giving it room to breathe.
Start with one shelf. Edit down to what you actually love using. See how it feels before committing to more.
If you try this in your own kitchen, come back and tell me how it turned out, or drop a question below if you get stuck on layout, height, or styling. I read every comment.